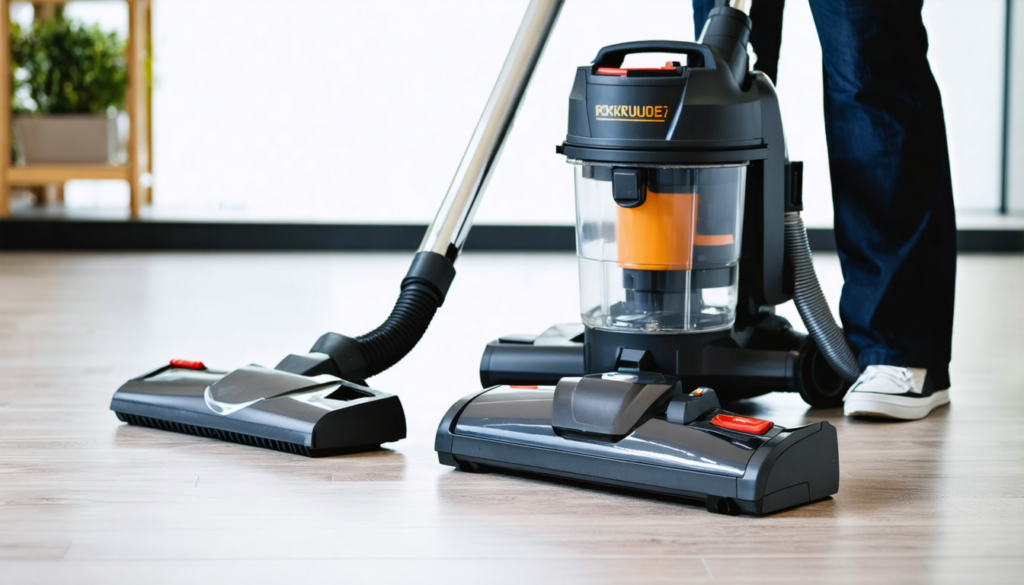
The vacuum cleaner has become an indispensable tool in our homes, greatly facilitating the task of daily cleaning. However, over time, signs such as loss of suction, an unpleasant odor, or marks on the floors may appear, often indicating neglected maintenance. These signs do not necessarily mean the end of your device’s life, but rather the need to adopt a strict maintenance routine. Fine dust, left to accumulate, can affect not only the performance of your vacuum cleaner but also the quality of indoor air. Regular, quick, and efficient maintenance is therefore the key to ensuring constant power, healthier air, and prolonging the lifespan of your equipment. Moreover, in 2025, with the evolution of models and technologies, keeping your vacuum cleaner in perfect condition becomes an essential act to preserve a clean interior effortlessly.
In a context where the quality of our indoor environment is increasingly monitored, understanding and mastering the key steps of vacuum cleaner cleaning allows you to combine performance and hygiene. Whether you have a vacuum cleaner with or without a bag, stick or canister, these maintenance actions adapt to make your device as efficient as on the first day. This guide details eight essential steps to be carried out regularly and methodically for effective cleaning that protects your investment and improves your living comfort.
- 1 Unplugging, disassembling and preparing your vacuum cleaner: essential steps for effective cleaning
- 2 Emptying the container or replacing the bag: preserving suction power
- 3 Cleaning and maintaining filters: ensuring healthy air and strong suction
- 4 Caring for brushes and wheels: the art of preserving mechanical parts for effective cleaning
- 5 Disinfecting, drying and inspecting: ensuring impeccable hygiene and optimal air circulation
Unplugging, disassembling and preparing your vacuum cleaner: essential steps for effective cleaning
Before proceeding with cleaning your vacuum cleaner, it is crucial to think about safety first. Handling an electrical device that is still plugged in exposes you to the risk of electrocution or accidental activation. Thus, unplugging the device from the power outlet is an essential step never to be omitted. This simple but vital precaution ensures a safe environment for disassembling and maintaining the equipment without risk.
Knowing your vacuum cleaner is also a key to success. Depending on the models, it consists of removable elements that should be isolated to clean separately. The dust container or, in the case of bag models, the compartment containing the bag, must be removed. Likewise, the filters, the hose, the telescopic tube, and the different brushes must be disassembled carefully. These parts should be placed on a clean, protected surface, such as an old newspaper or a drop cloth, to avoid spreading dust in your workspace and losing any small pieces.
Before cleaning, having the appropriate equipment on hand optimizes the operation. Here is a list of practical tools to prepare:
- A microfiber cloth to clear surfaces of dry dust;
- A soft brush or an old toothbrush to dislodge dirt and stubborn residues in tight spaces;
- Scissors or a seam ripper to cut hair and threads caught around brushes and rotating shafts;
- Warm water and mild soap or a diluted white vinegar solution to wash parts that are not sensitive to moisture;
- A well-ventilated space to allow complete drying after washing.
In this first phase, meticulous preparation of the device and its work environment not only facilitates cleaning but also improves its quality. It is also the time to assess the overall condition of the equipment to decide if some parts need to be replaced, especially if you notice tears in cords or an excessively clogged filter. Attention to these details guarantees a smoother and more effective next step: cleaning the dust collection system.
Emptying the container or replacing the bag: preserving suction power
The dust receptacle is the heart of your vacuum cleaner. Its regular maintenance is not only recommended but essential to maintain optimal suction power and avoid motor overheating. Indeed, a saturated container or bag obstructs airflow, forcing the device to work harder and risking damage to its internal components.
For bagless vacuum cleaners, it is advisable to empty the dust container systematically after each cleaning, without waiting for the maximum level to be reached. This vigilance prevents fine dust from clumping and prematurely clogging the filters. The container itself is generally designed to be washed with warm water and a little mild soap. After this step, air drying for at least 24 hours is essential to eliminate any trace of moisture that could harm the motor or cause mold growth.
In the case of vacuum cleaners with bags, the golden rule is never to wait for complete saturation before replacing it. When the bag is filled to more than two-thirds, the loss of efficiency is already noticeable. At each replacement, it is wise to clean the inside of the compartment with a damp cloth to remove remaining dust. To obtain optimal filtration and ensure a perfect fit, prioritize bags recommended by the manufacturer.
Impact of a full container on performance
An overly full container or bag can lead to several visible inconveniences:
- A progressive loss of power, making cleaning less efficient and requiring multiple passes over the same surface;
- Motor overheating, which can cause costly breakdowns and reduce the vacuum cleaner’s lifespan;
- Increased emission of fine dust particles into the air, impacting indoor air quality, particularly problematic for people suffering from allergies or asthma.
This maintenance step, although simple, is thus a major lever for regular and effective cleaning.
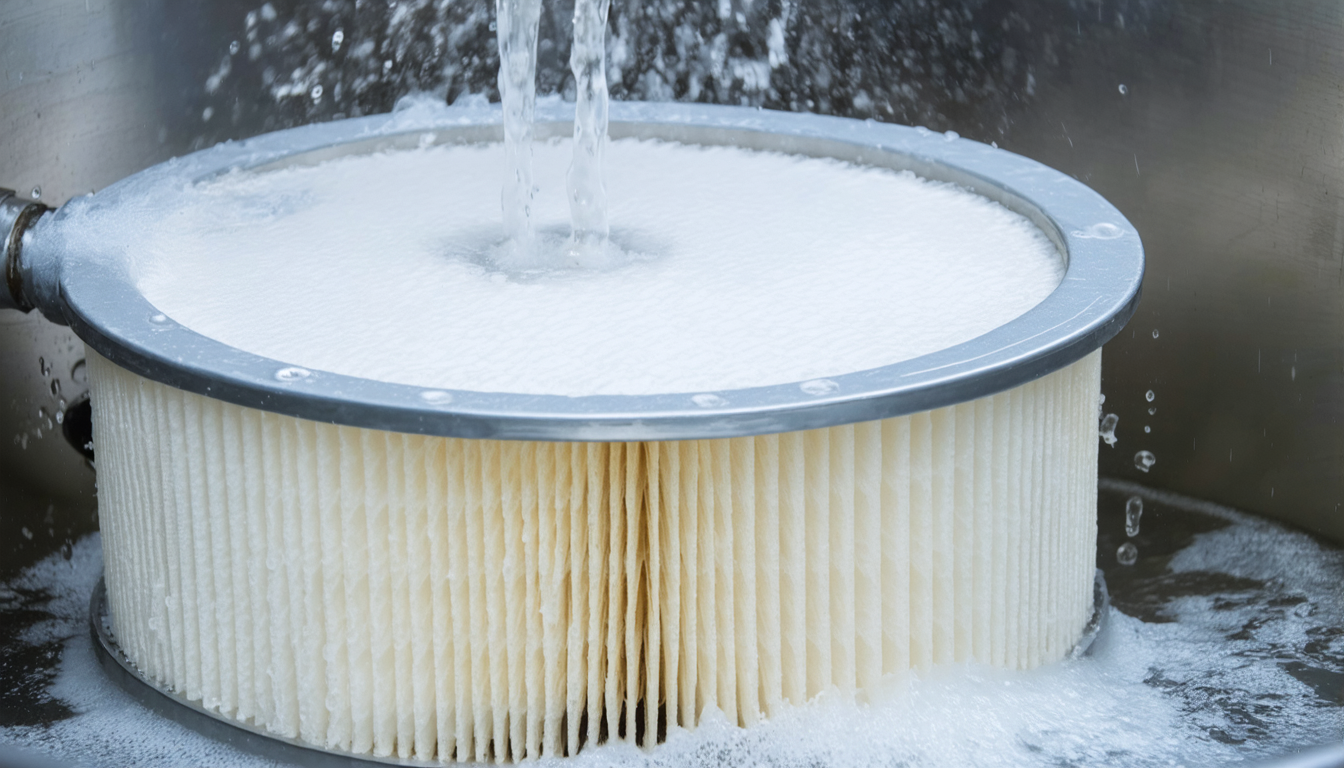
Cleaning and maintaining filters: ensuring healthy air and strong suction
Your vacuum cleaner’s filters are crucial components that protect the motor while filtering particles and allergens to deliver purified air into your home. A clogged filter inevitably results in reduced device performance, which can cause malfunctions and degrade your home’s air quality.
Generally, two main types of filters are distinguished:
| Filter type | Cleaning frequency (if washable) | Replacement frequency (if not washable) |
|---|---|---|
| Foam filter (pre-motor) | Monthly | Yearly |
| HEPA filter (air outlet) | Every 3 to 6 months | Every 12 to 24 months |
The motor filter (often foam or fabric) prevents fine dust from entering the motor. If washable, it is simply cleaned with warm water until the water runs clear. After gentle wringing, it must dry completely before being put back in place to avoid any corrosion or malfunction.
The HEPA filter, located on the air exhaust circuit, captures microscopic particles, essential for a healthy indoor environment, especially for allergic individuals. Maintenance instructions vary by model: some can be washed, others must be replaced to ensure consistent filtration.
Regular filter maintenance guarantees a powerful vacuum cleaner and an indoor environment free from the finest dust. Neglecting this step means accepting a progressive decline in cleaning quality and premature device replacement.
Caring for brushes and wheels: the art of preserving mechanical parts for effective cleaning
Brushes and wheels are the parts in direct contact with your floors and thus undergo the most mechanical wear. They play a key role in cleaning efficiency by dislodging embedded dust and allowing your vacuum cleaner to move easily.
Unfortunately, hair, pet fur, threads, and other debris tend to wrap around them, disrupting their rotation. A blocked brush or clogged wheels can make maneuvering your device difficult, prematurely wear moving parts, and make cleaning sessions less pleasant.
To maintain their proper functioning, follow these tips:
- Clean the main brush by turning it over and cutting clumps of hair or threads with scissors or a seam ripper. Detach the brush when possible for deep cleaning, and remove small debris with a fine comb or soft brush.
- Maintain accessories such as the crevice tool or upholstery brush by manually removing accumulated impurities from the bristles.
- Check the wheels and remove any thread or hair wrapped around the axles with pliers, then wipe them with a damp cloth to ensure smooth gliding without risking scratching your floors.
Good maintenance practice of these parts will extend your vacuum cleaner’s lifespan and facilitate each cleaning session by making your tool easier to handle and more efficient.
Disinfecting, drying and inspecting: ensuring impeccable hygiene and optimal air circulation
To go beyond simple mechanical cleaning, it is essential to sanitize and disinfect the various parts of the vacuum cleaner. From dust to bacteria accumulation, dark and damp corners are ideal spots for the proliferation of microorganisms responsible for bad odors and health risks.
Using mild products is recommended to preserve your equipment’s materials. A mixture of warm water and white vinegar, known for its natural disinfectant properties, constitutes an effective solution. Apply this preparation on a wrung microfiber cloth, then carefully clean:
- The inside and outside of the dust container, after emptying and washing it;
- The external casing of the device, avoiding any contact with electrical parts;
- The bodies of brushes and accessories.
In case of persistent odors, sprinkling baking soda in the dust container can absorb odors and smells. Let it sit for several hours before emptying and cleaning again.
Finally, drying all washed parts is a decisive step. Residual moisture is the enemy of your vacuum cleaner, causing mold and unpleasant odors. For this, leave the elements in the open air, in a well-ventilated space, for at least 24 hours, away from direct heat sources.
As a last essential check, inspecting hoses, tubes, and air passages allows you to eliminate any possible blockages. Persistent weak suction despite thorough maintenance may be caused by a clog formed by a small sucked-in object or debris accumulation.
Detaching and visually checking the hose and telescopic tube, shaking or unclogging them with a broom handle without sharp edges, are simple and effective operations. Never use a sharp object to avoid irreversible damage. This step ensures that the airflow circulates freely, which is imperative for long-term powerful and effective vacuuming.