As the cold months of November 2025 approach, preparing for a cozy winter inevitably involves good management of your firewood. Many neglect, however, that the secret to efficient heating lies primarily in the quality of storage. Indeed, poor wood storage organization can lead to a significant loss of calorific value, sometimes up to 50%, resulting in additional costs but also unnecessary environmental impact. Properly storing your firewood means housing it in a suitable wood shelter that combines rain protection and optimal ventilation, thus ensuring dry wood, ready to burn efficiently and safely. In a context where energy performance is more than ever a priority issue, adopting the right methods to dry wood and ensure wood durability is much more than a simple precaution: it is an investment in your comfort and budget.
Optimizing wood storage requires careful consideration of storage organization, shelter choice, and shelter maintenance. Whether you are a DIY enthusiast wanting to build a custom shelter or leaning towards a ready-to-use solution, this article will guide you step-by-step through best practices to successfully store your firewood. We will explain why good dry wood is imperative, how to avoid common mistakes, and how to select or build a wood shelter that will preserve the wood’s quality throughout the winter. The goal is to always have a high-performance fuel so that your evenings by the fire in 2025 remain synonymous with warmth, savings, and peace of mind.
- 1 Why well-thought-out wood storage is the key to high-performance firewood
- 2 Common mistakes to avoid for efficient wood drying and quality preservation
- 3 Designing and building a high-performance wood shelter: principles to follow
- 4 Choosing a ready-to-use wood shelter: what you need to know to select well
- 5 Essential actions to manage and maintain your firewood throughout the seasons
Why well-thought-out wood storage is the key to high-performance firewood
The primary issue when trying to properly store your firewood lies in the necessity to dry the wood correctly. A moisture content below 20% is essential to guarantee optimal heating. Burning wet wood causes a large part of the energy released to evaporate the water contained in the log rather than being converted into useful heat. This energy loss translates into a significantly reduced calorific value, sometimes halved, which directly impacts your heating bill.
To better understand this issue, here is a comparative table illustrating the impact of moisture content on combustion quality:
| Characteristic | Dry wood (< 20% moisture) | Wet wood (> 35% moisture) |
|---|---|---|
| Calorific value | Optimal (around 4 kWh/kg) | Low (around 2 kWh/kg) |
| Smoke production | Minimal | Abundant and opaque |
| Chimney fouling | Limited | Rapid (soot, creosote) |
Beyond thermal performance, poorly stored wood also encourages the proliferation of fungi, molds, and wood-boring insects that degrade the organic matter. This decomposition reduces the wood’s density and makes it less efficient while complicating the maintenance of both the shelter and the chimney. Excessive smoke generated by burning wet wood causes a dangerous accumulation of creosote, a flammable deposit that considerably increases the risk of fire.
Maintaining rigorous storage organization also prevents contact of the wood with damp ground, a common mistake that leads to water absorption by capillarity and accelerated degradation from the base of the pile. To illustrate, many households see a 30% increase in heating costs due to inadequate storage.
This shows how crucial the strategic choice of a wood shelter suited to your environment and its regular maintenance to preserve its wood durability are essential to fully benefit from your firewood this winter. Without this, loss of efficiency permanently tarnishes the initial investment and can make wood heating frustrating or even counterproductive.
Common mistakes to avoid for efficient wood drying and quality preservation
Wood storage is often compromised by simple but serious mistakes that prevent wood from drying properly. Here are the main errors to avoid, with examples relevant to users:
- Storing wood directly on the ground: This encourages moisture to rise by capillarity. For example, an owner stacking wood on soft earth often sees the bottom row rot quickly, contaminating the rest of the pile.
- Using an airtight tarpaulin: Though intended to protect wood from rain, a tarp that completely encloses the pile creates a greenhouse effect that prevents moisture from escaping. A customer in a rainy area noticed her wood molding after a few weeks under an unsuitable tarp, ruining her heating season.
- Overly dense stacking: When logs are tightly packed together, air does not circulate, preventing even drying. A pile too compact in the center remains damp even after several months.
To remedy these errors, it is recommended to follow good wood storage organization rules:
- Isolate wood from the ground: use pallets, battens, or an elevated structure to prevent rising moisture.
- Switch to partial cover: use a tarp only on the top, leaving the sides open for good ventilation.
- Space logs apart: leave a few centimeters between each row so air can circulate freely.
- Limit pile depth: ideally no more than two logs deep to allow effective airflow.
- Cross logs: at the ends to stabilize the pile and create natural air chimneys.
These recommendations play a crucial role in drying wood regularly while ensuring good rain protection and an optimal balance between ventilation and shelter. By avoiding these common mistakes, you significantly extend the lifespan of your firewood and preserve its quality throughout the season.
Designing and building a high-performance wood shelter: principles to follow
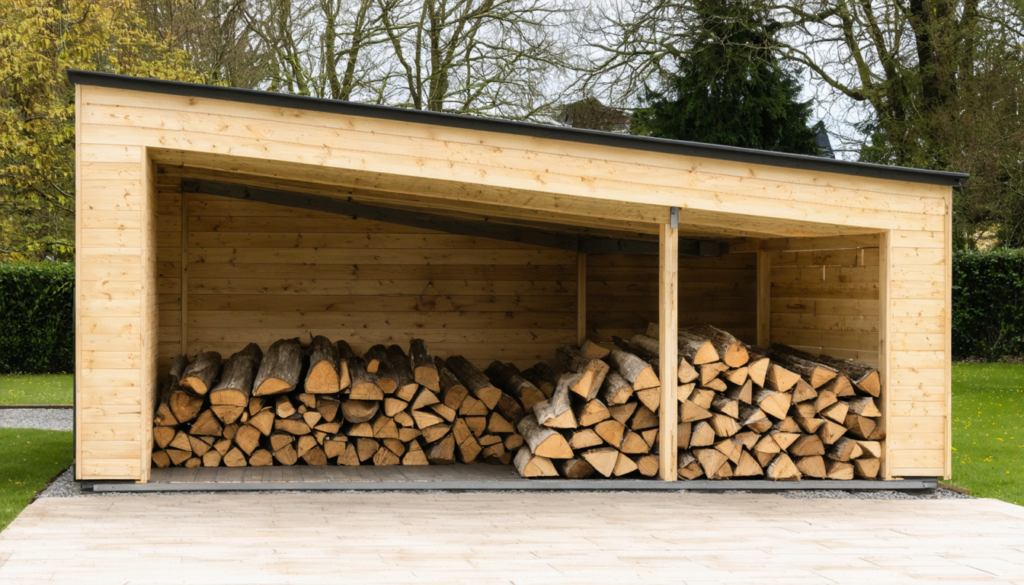
For those who want to take charge of building their wood shelter, several elements are essential to guarantee effective wood storage, focused on rain protection and ventilation.
Foundations of a wood shelter designed to dry wood
A wood shelter must not be airtight. Its purpose is to protect wood from the elements while allowing air to circulate freely. A sloped roof facilitates rainwater drainage, avoiding any stagnation. As for the walls, it is preferable they are built with open boarding, that is, with gaps between the boards to let the wind pass through.
The shelter must also be elevated on a stable floor, often made with pallets or wooden joists to prevent direct contact with damp ground. This is crucial to avoid moisture rising and thus the degradation of logs at the base of the pile.
Recommended materials for wood durability
Wood remains the most favored material for wood shelters because of its aesthetic qualities and ease of installation. Autoclave-treated wood class 3 or 4 is preferable for durable resistance against external aggressions. Recycled pallets are an economical and ecological alternative for building the structure.
For the roofing, it is possible to opt for corrugated sheets, polycarbonate, or bituminous shingles. These materials offer good waterproofing and resistance suitable for variable weather conditions.
Key steps for successful construction
- Preparing the base: choosing a stable, leveled spot with installation of pads or blocks to elevate the structure.
- Assembling the frame: assembling vertical posts and horizontal crossbars for rigidity.
- Installing the floor: fixing joists then laying spaced boards to ensure ventilation from below.
- Roof installation: creating a sufficient slope by installing the chosen covering, thus providing optimal rain protection.
- Attaching the siding: nailing boards while leaving regular gaps for constant air circulation.
This method guarantees a versatile, aesthetic, and functional shelter capable of keeping your wood dry while simplifying shelter maintenance. Building a wood shelter yourself also offers the pleasure of a custom layout tailored to your specific wood storage needs.

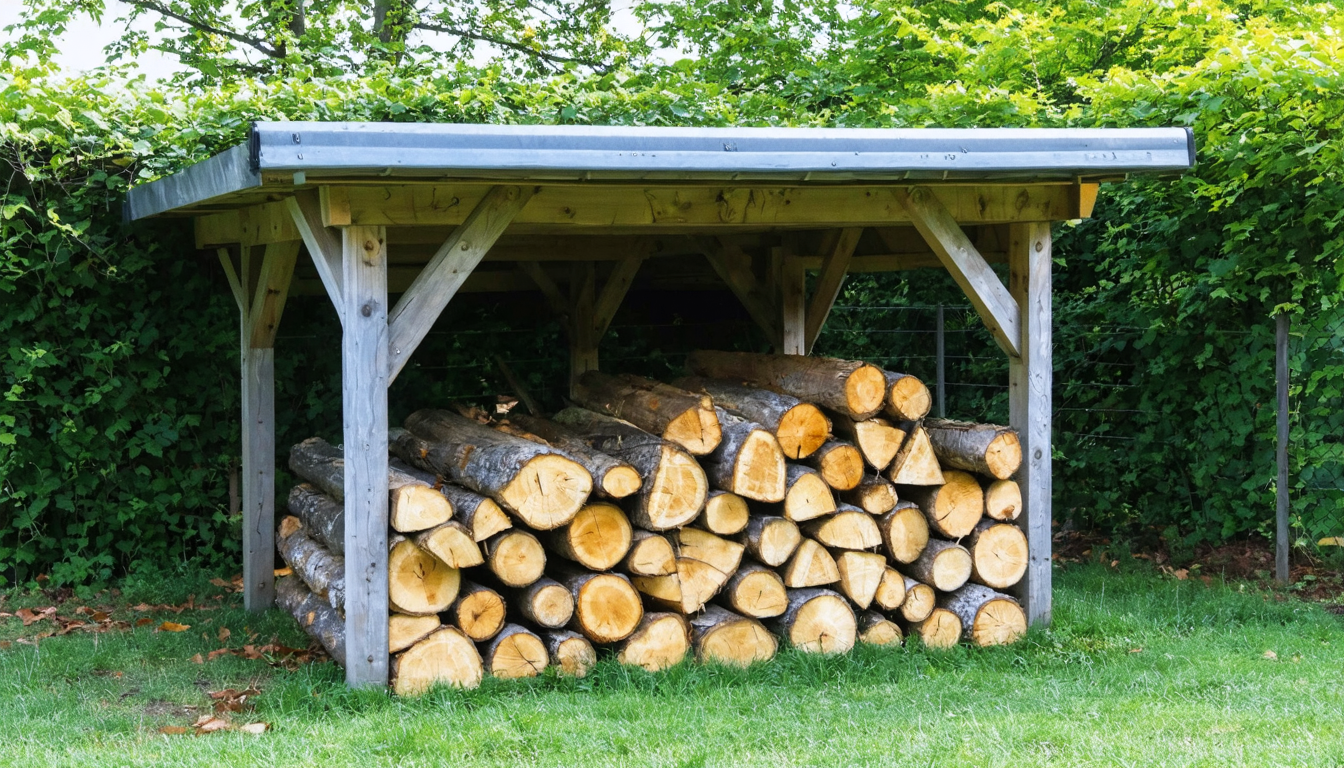
Choosing a ready-to-use wood shelter: what you need to know to select well
For those who prefer simplicity and speed, the market offers many ready-to-use wood shelters suitable for all budgets and situations. However, it remains essential to consider several key factors to make an informed choice:
- Capacity: expressed in cubic meters (stères), it must be adapted to your annual consumption with some margin for stock rotation.
- Material: treated wood, galvanized metal, or resin – each presents advantages and limits regarding wood durability, shelter maintenance, and aesthetics.
- Design: presence or absence of an elevated floor, open walls for ventilation, and roof shape (sufficient slope to avoid water stagnation).
- Dimensions: check the footprint and height based on available space and local urban planning constraints.
- Ease of assembly: a crucial point for non-DIYers; some models come in kits with clear instructions and quick assembly.
| Criterion | Description | Points of vigilance |
|---|---|---|
| Capacity (in stères) | Volume of wood the shelter can hold. | Plan for capacity exceeding annual needs to facilitate rotation. |
| Material | Treated wood, galvanized metal, PVC resin. | Check the wood’s anti-moisture treatment and metal’s galvanization quality. |
| Design | Floor, open walls, sloped roof. | Favor ventilation and wood insulation with an elevated floor. |
| Dimensions | Adapted to the intended location. | Respect local urban planning rules. |
| Assembly | Ready-to-assemble kit or preassembled structure. | Prefer simple and quick assembly if you are not very handy. |
The variety of commercial shelters allows everyone to find a solution adapted to their constraints. Combining thoughtful shelter choice with good wood storage organization guarantees well-prepared wood for the season without excessive maintenance worries.
Essential actions to manage and maintain your firewood throughout the seasons
The presence of a wood shelter, no matter how well built or chosen, is not sufficient by itself. Rigorous storage organization remains essential to optimize the quality of firewood over time.
Wood rotation: first in, first out principle
To burn always dry wood, you must first respect the simple rule called “first in, first out.” Freshly cut green wood should be placed at the back of the shelter. Wood that has already dried for one to two years is positioned in front, ready to be used. This principle avoids burning still wet wood and guarantees efficient and safe consumption.
Measuring moisture with a moisture meter
Besides visual signs such as cracks at the ends, lightness of logs, or the clear sound they make when tapped, the best method is to use an electronic moisture meter. This inexpensive device accurately detects the moisture content at the core of a split log to ensure it is below 20%, the threshold essential for optimal heating.
Setting up a buffer stock accessible in winter
To avoid having to go too far from the house in the cold, maintaining a small volume of wood within easy reach, for example in an equipped garage or sheltered porch, is very practical. This buffer stock also helps slightly warm the logs, improving their combustion by eliminating surface moisture, often present in wood left outside.
Finally, regularly maintaining your wood shelter by checking for mildew on its structure, the floor’s good condition, and respecting ventilation gaps is essential to prolong its lifespan and efficiency. Regular shelter maintenance prevents wood storage quality from degrading over time and ensures constant comfort.